
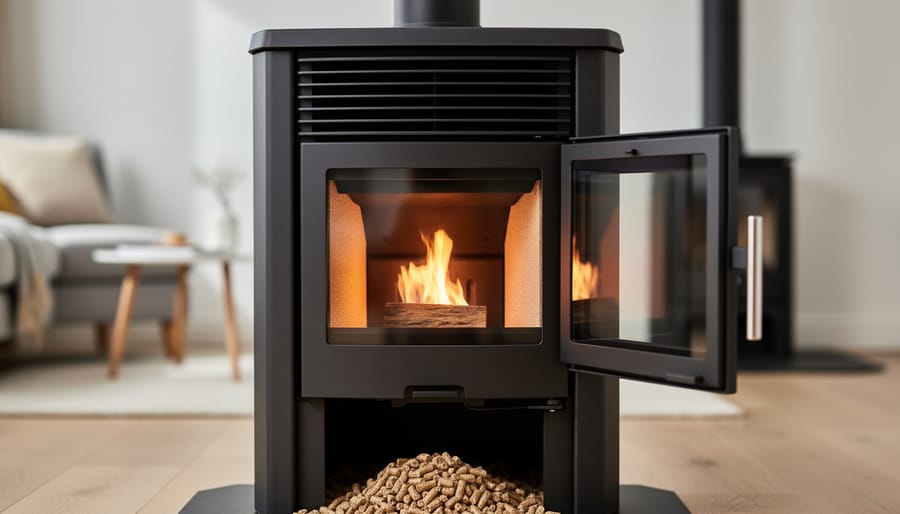
Lighting a pellet stove takes about 10 minutes and requires just three simple steps: fill the hopper with pellets, prime the auger, and press the ignition button. Once you understand the basic sequence, you’ll have consistent, efficient heat every time you need it.
For families working to create a warm, stable home, a pellet stove can be a reliable heating solution that’s both economical and easy to maintain. Whether you’ve just received a donated stove, moved into a new place, or are simply getting ready for the colder months ahead, knowing how to start your stove safely gives you confidence and comfort when temperatures drop.
The process is straightforward, but small details matter. Checking that your stove is clean, properly vented, and supplied with quality pellets prevents frustration and ensures safe operation. You’ll also want to verify that the stove ignites fully and reaches the right temperature, signs that everything is working as it should.
This guide walks you through each step with clear instructions, from the materials you’ll need to common troubleshooting tips. Even if you’ve never used a pellet stove before, you’ll be able to light yours successfully and keep your home warm throughout the season.
What You’ll Need to Light Your Pellet Stove
Before you light your pellet stove, gather everything you’ll need. Having these items ready makes the process smooth and helps you avoid mid-task interruptions.
- Quality wood pellets designed for heating stoves, not animal bedding
- Firestarter gel or paraffin fire-starter cubes made for wood stoves
- Long-reach lighter or fireplace matches for safe ignition
- Your stove’s manufacturer manual for model-specific instructions
- Work gloves to protect your hands from ash and heat
- Small metal scoop or ash vacuum for cleaning the burn pot
- Flashlight to inspect the burn pot and interior clearly
Most pellet stoves require standard wood heating pellets with low moisture content, typically sold in 40-pound bags. Avoid using pellets meant for animal bedding, as these can contain additives that damage your stove or create unsafe fumes. The firestarter gel or cubes give your initial pellets the boost they need to catch fire reliably. Skip using newspaper or regular kindling, which can create too much ash.
Keep your manufacturer’s manual handy even if you’ve lit the stove before. Different models have specific quirks, and the manual often includes troubleshooting tips that save time. The long lighter matters more than you might think, it keeps your hands safely away from the flame and makes reaching into the burn pot much easier.
If you’re missing any of these items, most hardware stores carry everything on this list. Taking five minutes to prepare means you’ll light your stove correctly the first time, creating the warm, comfortable home every family deserves.
Safety First: What to Check Before You Light
Before you strike that first match, take a few minutes to run through these critical safety checks. A safe start protects both your home and everyone in it, giving families the stable, warm environment they deserve.
Start by confirming your stove has clear ventilation. Open the damper if your model has one, and make sure nothing is blocking the air intake or exhaust vents. You need to ensure proper ventilation for the stove to burn cleanly and safely. Step outside and check that the chimney or vent pipe is free from obstructions like bird nests, leaves, or excessive creosote buildup.
Next, inspect your pellets. They should feel dry and produce little dust when you handle them. Wet or deteriorated pellets won’t burn properly and can create dangerous creosote buildup or excess smoke. Store your pellets in a dry location, off the ground, and away from moisture.
Check the door seals and gaskets around the stove. Run your hand along the edges when the stove is cool, you shouldn’t feel any gaps or worn spots. A tight seal keeps smoke and fumes inside where they belong.
Finally, prepare your home by clearing the area around your stove. Remove newspapers, furniture, curtains, and any other flammable materials at least three feet away in all directions. If you’re setting up a stove for the first time, adding this step to your home safety checklist ensures you won’t overlook it later. These simple precautions create a foundation for safe, reliable heating.
Step-by-Step: Lighting Your Pellet Stove
Preparing the Stove
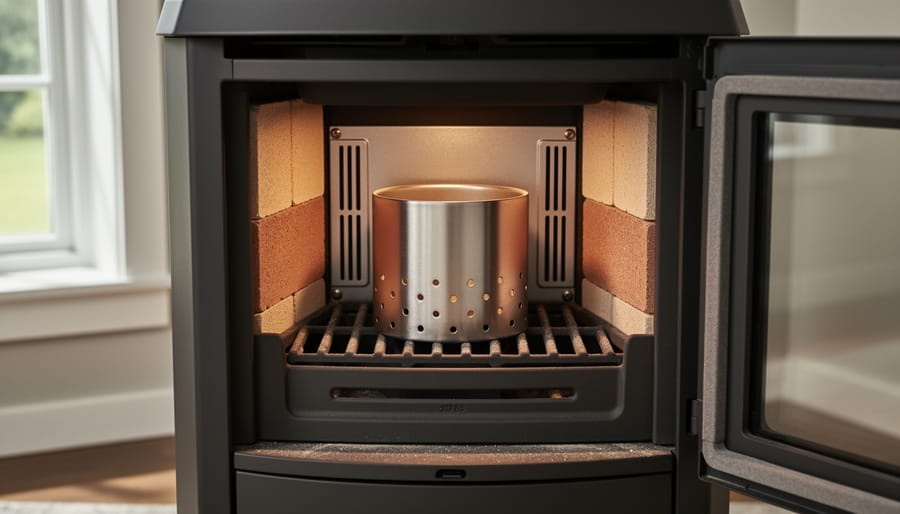
Start by removing any leftover ash from the burn pot using a small metal scoop or ash vacuum. Even a thin layer can block airflow and prevent proper ignition, so scrape down to bare metal. Don’t worry if you can’t get every speck, just clear away the bulk.
Next, fill the hopper with dry, high-quality pellets. Pour them in gently to avoid creating excessive dust, and fill to about three-quarters full rather than packing it tight to the top. This gives the pellets room to settle and feed smoothly into the auger. Check the pellets as you pour, they should feel firm and dry, not soft or crumbly, which signals moisture damage.
Finally, close the hopper lid firmly and make sure it latches. A loose lid lets humidity in, which degrades your pellets and can cause feeding problems. Some models have a gasket around the lid, press down until you feel it seal. If your stove has been sitting unused, run your hand along the lid edge to confirm it’s seated properly before moving on.
Starting the Fire
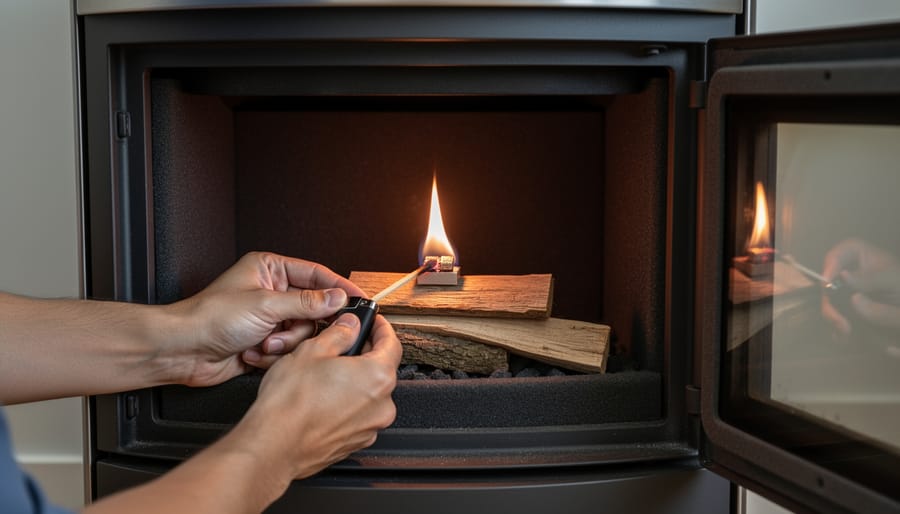
Step 4: Add a small handful of pellets to the burn pot. Open the stove door and place about a quarter cup of pellets directly in the burn pot, just enough to get the initial fire going. Don’t overfill it. Too many pellets at this stage can smother the flame before it takes hold, and you want those first pellets to catch quickly.
Step 5: Apply your firestarter. Squeeze a small amount of firestarter gel onto the pellets, or place one firestarter cube in the center of the burn pot. Either works well, but gel gives you more control over placement. Use just enough to ignite the pellets, a little goes a long way. If you’re using gel, a dollop about the size of a quarter is plenty.
Step 6: Light the pellets. Using your long lighter or fireplace matches, carefully ignite the firestarter. You should see flames catch within seconds. Keep your face and hands clear of the opening, and don’t lean directly over the burn pot. Let the fire establish itself for about 30 seconds before moving to the next step. You’ll see the pellets start to glow and the flame spread.
Step 7: Close the door securely. Once the fire is burning steadily, gently close the stove door until it latches completely. A proper seal is essential for the stove to draw air correctly and burn efficiently.
Getting the Stove Running
Step 8: Turn on the stove’s power and controls. Once the firestarter has ignited the pellets in the burn pot, locate the main power switch on your pellet stove. This is typically found on the control panel or side of the unit. Flip the switch to the “on” position. You should hear the combustion blower start up, which creates the airflow needed to sustain the fire and vent exhaust properly. Some models have a separate igniter button, but since you’ve manually lit the stove, the combustion blower is what you need to activate.
Step 9: Set your desired temperature or pellet feed rate. Use the digital control panel or manual dial to adjust your settings. Many modern pellet stoves let you set a target room temperature, and the unit will automatically adjust pellet feeding to maintain that warmth. If your model uses manual feed settings instead, start with a low to medium setting (usually 2 or 3 on a scale of 1 to 5). This allows the fire to build gradually without smothering the flame with too many pellets. A properly functioning stove will keep floors warm and create a comfortable environment throughout the room.
Step 10: Allow the auger to begin feeding pellets automatically. Within a few minutes of turning on the controls, you’ll hear a mechanical sound as the auger activates. This motorized screw mechanism transports pellets from the hopper into the burn pot at the rate you’ve set. Watch through the viewing glass to confirm pellets are dropping into the flame. The fire should grow steadily as fresh fuel arrives, building from your initial manual lighting into a self-sustaining burn that requires no further intervention.
How to Know Your Stove is Lit Correctly
Within five to ten minutes of lighting your pellet stove, you should see a steady, bright flame developing in the burn pot. The fire will start small but should grow consistently as the auger feeds pellets at regular intervals, you’ll hear a gentle mechanical sound every 30 to 60 seconds as fresh pellets drop in. This rhythmic feeding is your first good sign that everything’s working as it should.
Watch the glass door as the stove runs. It should stay mostly clear, though a light film can develop over hours of use. Heavy black soot appearing quickly means something’s wrong, usually poor air flow or wet pellets. The heat distribution should feel even as you move around the room, not blasting from one spot while other areas stay cold.
Pay attention to smoke and smell. A faint burnt odor during the first lighting of a new stove is normal and will fade. Ongoing heavy smoke, especially black smoke, signals incomplete combustion. Make sure your vent isn’t blocked and you’re using dry, quality pellets.
If your flame keeps dying out, check that pellets are feeding consistently and the burn pot isn’t clogged with ash. A weak, flickering flame often means the air intake needs adjustment or cleaning. Before addressing any mechanical issues, make sure you remove clutter safely from around the stove, keeping the area clear prevents accidents and ensures proper airflow.
Trust your senses. If something feels off, it probably is. Turn off the stove and consult your manual rather than pushing through a problem.
Common Questions About Lighting Pellet Stoves
Can you light a pellet stove manually if the igniter fails?
Yes, you can light it manually using firestarter gel or cubes and a long lighter, just like in the steps above. Simply add pellets to the burn pot, apply your firestarter, light it, and then turn on the stove so the auger feeds pellets once the initial fire is established.
How long does it take for a pellet stove to light?
Most pellet stoves take between 5 and 10 minutes to develop a steady flame. If you’re using the automatic igniter, it might take closer to 10 minutes, while manual lighting with gel or cubes can be slightly faster.
What if my stove won’t stay lit?
A flame that keeps going out usually points to a few common issues: wet or poor-quality pellets, insufficient airflow, a dirty burn pot, or the feed rate set too low. Check that your pellets are dry and your vents are clear, then try adjusting the feed rate up slightly.
Is it normal to smell something when first lighting?
A faint smell during the first few lightings of a new stove is normal as manufacturing oils burn off. However, strong or persistent odors, especially after the stove is broken in, can signal incomplete combustion or a ventilation problem and should be checked.
Do you need to prime a new pellet stove?
Yes, when you first install a stove or if the hopper has been completely empty, you’ll need to prime it. Hold down the feed button until you see pellets drop into the burn pot, this fills the auger tube and usually takes 30 seconds to a couple of minutes.
Why is there excessive smoke when I light my stove?
Too much smoke typically means something is blocking proper airflow, check your vent pipe and chimney for obstructions, make sure the door gasket seals tightly, and confirm the air intake isn’t clogged. A dirty burn pot can also cause smoking.
These questions come up because lighting a pellet stove, while straightforward, can feel uncertain when you’re new to it or something doesn’t go quite right. The good news is that most issues have simple fixes. If you’re still having trouble after checking these common causes, don’t hesitate to call a professional technician. Getting your stove working properly means you and your family can count on consistent warmth, and that peace of mind matters.
Lighting your pellet stove doesn’t have to be intimidating. With proper preparation, attention to safety, and these straightforward steps, you can confidently start your stove and enjoy consistent, efficient heat throughout the cold months.
A warm home is more than just comfort, it’s stability, security, and peace of mind for you and your family. Whether you’re heating your own space or helping someone in need stay warm, a functioning pellet stove makes a real difference in daily life.
If you follow these instructions and still encounter problems, don’t hesitate to contact a certified technician. Persistent issues with ignition, smoke, or flame quality deserve professional attention to keep your home safe and your stove running efficiently. With a little practice, lighting your pellet stove will become second nature, giving you reliable warmth exactly when you need it.